VNC (Virtual Network Computing) Server
allows the remote Desktop sharing using remote VNC clients like VNC
viewer. In CentOS 7 & RHEL 7 package named “tigervnc-server” needs to be installed in order to setup the VNC server.
In this article we will go through the installation and configuration of VNC Server on CentOS 7 / RHEL 7.
While Copying the VNC config file we can mention the port number on which we want VNC service to be listen. In my case i am using port 3 , it means VNC will listen on “5903”. So while Connecting to the VNC server We can specify port number as <IP_Address_VNC_Server:3> or <IP_Address_VNC_Server:5903>
Step:4 Update the User’s Information in the Config File
[root@linuxtechi ~]# vi /etc/systemd/system/vncserver@:3.service

Replace the “linuxtechi” user as per your requirement. In my case linuxtechi user will able to control and manage its desktop session using remote VNC clients.
Set the Firewall Rule if firewall is enabled on your linux box.

Start and Enable the VNC Service at boot.
Execute below commands as root only.
ubuntu@localhost:~$ vncviewer 192.168.1.15:3
Enter the VNC password that we have set in above step, after validating the authentication Remote Desktop session will start.
From Windows Machine Using VNC Viewer
Enter the VNC Server IP Address and Port Number and then Click on OK

Enter the VNC Password & then click on OK.

Desktop Session Will start after authentication.

sumber : https://www.linuxtechi.com/install-configure-vnc-server-centos-7-rhel-7/
Step:1 Make Sure the Desktop Packages are installed
In order to setup VNC server first we make sure that Desktop is installed ,in My case i am using Gnome Desktop. If Gnome Desktop is not installed on your Linux machine then use the below command to install.[root@linuxtechi ~]# yum groupinstall "GNOME Desktop"
Step:2 Install Tigervnc and other dependency Package.
[root@linuxtechi ~]# yum install tigervnc-server xorg-x11-fonts-Type1
Step:3 Setup VNC Server Configuration File.
Copy the VNC config file “/lib/systemd/system/vncserver@.service” to the “/etc/systemd/system/vncserver@:<Port_Number>.service”.While Copying the VNC config file we can mention the port number on which we want VNC service to be listen. In my case i am using port 3 , it means VNC will listen on “5903”. So while Connecting to the VNC server We can specify port number as <IP_Address_VNC_Server:3> or <IP_Address_VNC_Server:5903>
[root@linuxtechi ~]# cp /lib/systemd/system/vncserver@.service /etc/systemd/system/vncserver@:3.service
Step:4 Update the User’s Information in the Config File
[root@linuxtechi ~]# vi /etc/systemd/system/vncserver@:3.service
Replace the “linuxtechi” user as per your requirement. In my case linuxtechi user will able to control and manage its desktop session using remote VNC clients.
Set the Firewall Rule if firewall is enabled on your linux box.
[root@linuxtechi ~]# firewall-cmd --permanent --zone=public --add-port=5903/tcp
success
[root@linuxtechi ~]# firewall-cmd --reload
success
[root@linuxtechi ~]#
Step:5 Set the VNC password for the User.
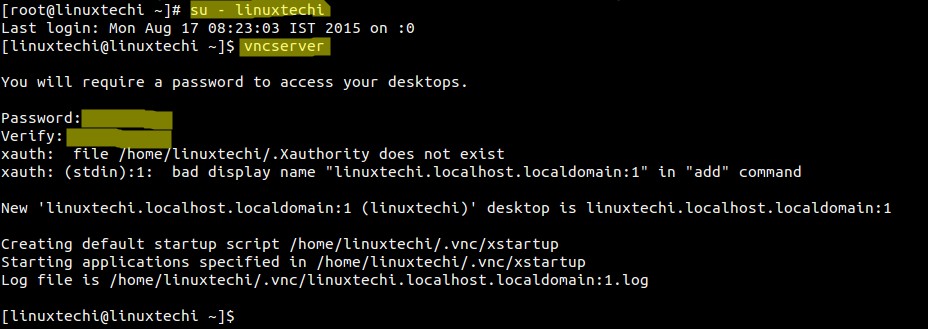
Switch to the user (linuxtechi) and run vncserver command to set the password as shown below :
Start and Enable the VNC Service at boot.
Execute below commands as root only.
[root@linuxtechi ~]# systemctl daemon-reload
[root@linuxtechi ~]# systemctl start vncserver@:3.service
[root@linuxtechi ~]# systemctl enable vncserver@:3.service
ln -s '/etc/systemd/system/vncserver@:3.service' '/etc/systemd/system/multi-user.target.wants/vncserver@:3.service'
[root@linuxtechi ~]#
Step:6 Access Remote Desktop Session.
From Ubuntu Machine :ubuntu@localhost:~$ vncviewer 192.168.1.15:3
Enter the VNC password that we have set in above step, after validating the authentication Remote Desktop session will start.
From Windows Machine Using VNC Viewer
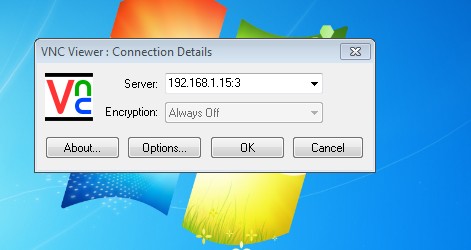
Enter the VNC Server IP Address and Port Number and then Click on OK

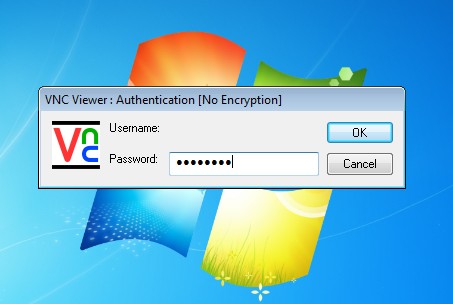
Enter the VNC Password & then click on OK.

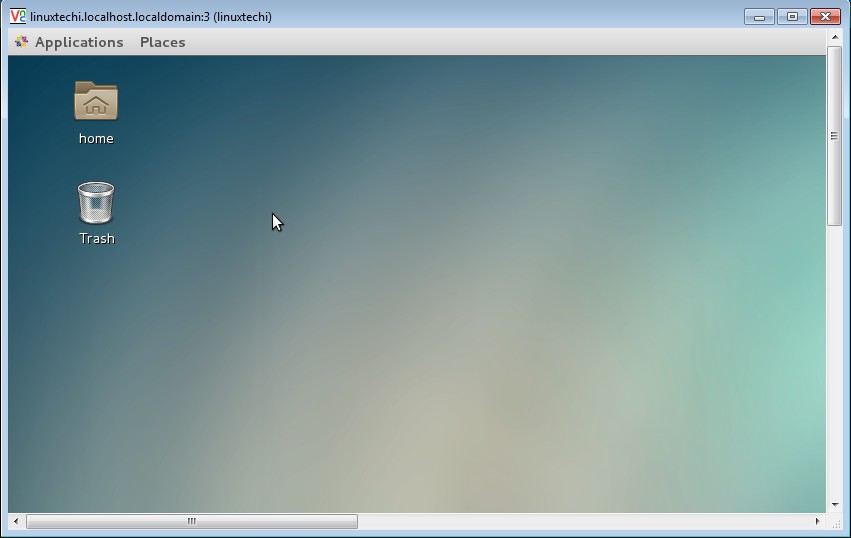
Desktop Session Will start after authentication.

sumber : https://www.linuxtechi.com/install-configure-vnc-server-centos-7-rhel-7/


0 Comments